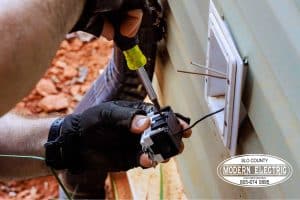
Recessed lighting, also known as can lights or pot lights, has surged in popularity among homeowners seeking sleek and versatile lighting solutions. Whether remodeling your kitchen, brightening your living area, or adding a touch of elegance to your bathroom, recessed lighting enhances both function and style. At SLO County Modern Electric, we’ve created this extensive guide to help you understand every aspect of recessed lighting installation, empowering you to successfully complete the project yourself or recognize when professional help is beneficial.
Understanding Recessed Lighting Installation
Recessed lighting fixtures, installed directly into ceilings, create a clean and unobtrusive look, minimizing visual clutter and maximizing room spaciousness. They come in several varieties, each with specific advantages:
- LED recessed lights: Energy-efficient, cost-effective, long-lasting.
- Pot lights: Smaller fixtures, ideal for targeted task or accent lighting.
- Can lights: Larger traditional recessed fixtures suitable for general lighting.
LED recessed lighting is a popular, energy-efficient installation option that is compatible with most modern wiring and fixtures.
Optimal placement includes kitchens, bathrooms, living rooms, bedrooms, and even hallways to ensure practical, attractive illumination.
Introduction to Recessed Lights
Recessed lights, often referred to as can lights or recessed lighting, are a popular choice for homeowners seeking a modern, minimalist look in any room. These fixtures are installed directly into the ceiling, allowing the light source to sit flush with the surface for a clean and unobtrusive appearance.
When installing recessed lighting, it’s important to consider the different types available. Baffle trim recessed lights are designed to reduce glare and are ideal for living rooms or bedrooms. Eyeball trim options offer adjustable direction, making them perfect for highlighting artwork or architectural features.
For spaces with insulation above the ceiling, insulation contact (IC) rated housings are essential to prevent overheating and ensure safety. By selecting the right recessed lights for your space, you can achieve the perfect balance of style, function, and energy efficiency, all while enhancing the overall ambiance of your home.
Benefits of Adding Recessed Lighting
Adding recessed lighting transforms living spaces significantly, providing:
- Enhanced aesthetics: Achieves a contemporary, streamlined appearance, visually expanding spaces.
- Property value increase: Lighting upgrades directly impact home resale value, appealing to modern homebuyers.
- Energy savings: LED recessed lights dramatically lower electricity bills due to their efficiency.
- Versatility: Suitable for all lighting needs—ambient, task, or accent, and adjustable to personal preferences.
For many homeowners, the process of installing recessed lighting is pretty straightforward, especially with modern kits and clear instructions.
Tools and Materials Needed

For an efficient installation, gather the following materials and tools:
- Recessed lighting fixtures and LED bulbs
- Electrical wires (appropriate gauge)
- Circuit tester (voltage tester)
- Wire cutters and strippers
- Drywall saw and drill with hole-saw attachment
- Ladder, measuring tape, and pencil (used to measure and draw the outline for ceiling cutouts before installation)
- Personal protective equipment (gloves, safety glasses)
Electrical Requirements for Recessed Lighting
Before you install recessed lighting, it’s essential to evaluate your home’s electrical system to ensure a safe and effective installation. Start by determining how many recessed lights your existing circuit can support without overloading the circuit breaker panel.
Check the total wattage of the new lights and compare it to the capacity of the existing circuit to avoid tripping breakers or creating a fire hazard. It’s also important to identify the type of wiring in your home—whether it’s aluminum or copper—and replace any outdated or unsafe wiring as needed.
Always consult the National Electric Code (NEC) for your area to make sure your installation meets all safety standards and local regulations. By carefully assessing these electrical requirements, you’ll set the stage for a successful recessed lighting project that’s both safe and up to code.
Step-by-Step Guide to Recessed Lighting Installation
Step 1: Planning the Layout
Careful planning ensures uniform and functional lighting coverage. Measure your ceiling carefully, spacing fixtures evenly, typically 4 to 6 feet apart. When planning, also consider how many lights are needed for the room based on its size and lighting requirements. Mark clearly with a pencil, verifying locations to avoid beams, pipes, and existing wiring.
Step 2: Cutting Holes in the Ceiling
Cutting a precise ceiling hole in the ceiling drywall for each fixture minimizes patching and repair work. Use a drywall saw or a hole-saw drill attachment, and cut steadily along the pencil markings. Always double-check dimensions before cutting.
Step 3: Wiring Recessed Lights
Safety first—always switch off power at your electrical panel. To wire recessed lighting, start by planning the path for your wiring. Pull the electrical wire through the ceiling, using fishing wires if necessary, and ensure the wire enters each junction box or switch box securely.
At each fixture, connect the black wire (hot) to the black wires from the power source, and the white wire (neutral) to the white wires, making sure all connections are tight and secure. Attach the ground wire from the fixture to the ground wires in the box, and if using a metal box, ensure all ground wires are also securely fastened to the box for proper grounding.
If you need to add lights to the same circuit, you can daisy chain the wiring from one fixture to the next, as long as you do not exceed the circuit’s capacity. For larger installations, consider wiring a new circuit from the main panel to handle the additional load.
When installing a new switch or dimmer switch, identify the two wires in the existing switch box—typically the black (hot) and white (neutral) wires—and connect them according to the switch manufacturer’s instructions. Make sure all fixtures are properly wired and grounded for safety and code compliance.
Step 4: Installing Fixtures
Insert fixtures gently into the prepared holes, ensuring the correct light housing is used for your ceiling type and insulation requirements, then secure them using the manufacturer’s clips or brackets. Fixtures should sit flush against the ceiling, providing a seamless appearance.
Step 5: Connecting and Testing
After installing fixtures, carefully connect wires according to color coding and wiring diagrams provided with the fixtures. Turn on power to test each fixture individually, ensuring safe and correct connections using a circuit tester. For each recessed light, check for proper function and safety during this process.
Daisy Chaining and Advanced Layout Techniques
Daisy chaining is a widely used method when installing recessed lighting, allowing multiple recessed lights to be connected in sequence to a single power source. This approach helps create even, consistent lighting throughout a room and can simplify the wiring process.
However, it’s crucial to ensure that the total wattage of all daisy chained lights does not exceed the capacity of the existing circuit, as overloading can lead to electrical hazards. For more creative lighting designs, consider advanced layout techniques such as staggering the placement of recessed lights or combining recessed lighting with other fixture types to achieve layered illumination.
Always follow the manufacturer’s instructions and adhere to local electrical codes when connecting and wiring recessed lights.
By using daisy chaining and thoughtful layout strategies, you can design a lighting system that is both functional and visually appealing, tailored to the unique needs of your space.
Installing in Existing Ceilings
Retrofitting recessed lighting in an existing ceiling involves extra considerations. If you have access to the attic above the ceiling, running new wiring can be much simpler and safer.
First, check for any structural obstacles or wiring limitations. Use existing wiring whenever possible, but be prepared for the possibility of running additional lines. If significant wiring or structural changes are required, it’s advisable to consult professionals.
Common Mistakes to Avoid
- Incorrect spacing: Poor planning results in uneven lighting and shadows.
- Ignoring safety: Always prioritize electrical safety—power off and test circuits.
- Incorrect fixtures or bulbs: Ensure compatibility with fixtures to avoid overheating and inefficiency. Select the right lightbulbs for recessed lighting to maximize safety and energy efficiency.
Frequently Asked Questions
- How long does recessed lighting installation take? Usually 2-4 hours per room, depending on complexity and existing infrastructure.
- What does installation cost? Costs typically range from $150 to $400 per fixture, influenced by fixture type, ceiling height, and wiring needs. For example, installing four recessed lights in a standard 8-foot ceiling with easy attic access might cost around $600 to $1,200 in total.
- Do recessed lights improve home value? Absolutely, modern lighting significantly enhances home attractiveness and functionality.
- Can recessed lighting be installed in any ceiling? Most ceilings can accommodate recessed lighting, though structural or insulation constraints might require special fixtures or professional assistance.
Pricing for Recessed Lighting Installation (Expanded Explanation)
When planning a recessed lighting project, understanding recessed lighting costs and the overall cost is crucial. The total price typically depends on several key factors:
Detailed Cost Factors:
- Type of Fixture:
- Standard incandescent or halogen fixtures: Budget-friendly initially, but higher long-term energy costs.
- LED fixtures: Higher initial cost, offset by significant long-term energy savings and durability.
- Number of Fixtures:
- Typically, costs scale down slightly per fixture as more lights are installed due to labor and materials efficiency.
- Installation Complexity:
- Installing recessed lighting in new construction or accessible ceilings is straightforward, keeping costs lower.
- Retrofitting in existing ceilings or dealing with obstacles (wiring, insulation, beams) raises labor costs significantly.
- Additional Electrical Work:
- New wiring, circuit breakers, dimmers, or switches add to costs.
- Installing new fixtures, such as additional recessed lights, can increase the overall project cost.
- Upgrades to meet local building codes or handle higher power loads are additional considerations.
Pricing Chart (Per Fixture)
Let’s look see how prices and fixtures compare to each other:
| Type of Installation | Low-End Cost | High-End Cost |
|---|---|---|
| New construction (basic fixtures) | $150 | $200 |
| Retrofit (standard fixtures) | $200 | $300 |
| Retrofit (LED fixtures) | $250 | $400 |
| Complex wiring or ceiling access issues | $350 | $500+ |
| Additional wiring or switches | $75 | $150 per switch |
Note: Prices include fixtures, labor, basic wiring, and installation materials. Complex scenarios or premium fixtures can further influence costs.
For the most current pricing and permit requirements, consult your local government or utility provider’s page.
When to Hire a Professional
While recessed lighting installation might appeal to confident DIY enthusiasts, several situations clearly warrant professional involvement:
- Complex electrical work: If wiring involves extensive changes, or circuit panel upgrades are needed, professionals should handle it for safety and compliance. Most electricians recommend that the necessary permits be pulled before starting the job to ensure compliance with house codes.
- Structural modifications: Cutting into ceilings with beams, insulation, or complicated structures requires experienced handling.
- Building code adherence: Local codes vary; professionals like SLO County Modern Electric are familiar with requirements in San Luis Obispo and surrounding areas.
Hiring a licensed electrician for the job ensures all work is up to code and safe for your house. Professional installation ensures safety, compliance, and peace of mind.
Why Choose SLO County Modern Electric
SLO County Modern Electric has proudly served homeowners across San Luis Obispo count for years. Our certified electricians deliver exceptional quality, ensuring each project is executed safely, efficiently, and aesthetically pleasing. Our satisfied customers regularly praise our reliability and professionalism, and we hope you are just as pleased with our service and results.
Get Quote
Tell us a little about your project and we’ll get back to you with a fast, honest estimate. We’re here to make your life easier, not harder.


